MariaDB Galera Cluster on Ubuntu 24.04
 NeeRoz M
MariaDB Galera Cluster on Ubuntu 24.04


MariaDB Galera Cluster provides synchronous multi-master replication for MariaDB. In this guide, we will set up a 3-node Galera cluster on Ubuntu 24.04 servers.
Cluster Architecture
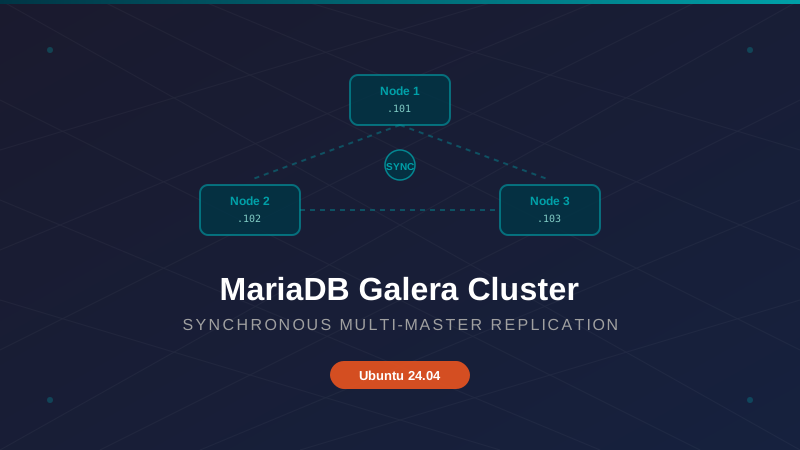
We will create a 3-node MariaDB Galera cluster:
                MariaDB Galera Cluster
                ======================

          ┌──────────────────────────┐
          │        Node 1             │
          │  192.168.1.101            │
          │  mariadb-node1            │
          └────────────┬─────────────┘
                       │
             ┌─────────┴─────────┐
             │                   │
             ▼                   ▼
    ┌────────────────┐   ┌────────────────┐
    │    Node 2      │   │    Node 3      │
    │ 192.168.1.102  │   │ 192.168.1.103  │
    │ mariadb-node2  │   │ mariadb-node3  │
    └────────────────┘   └────────────────┘
Galera provides synchronous replication between the nodes.
Server Information
| Node | Hostname | IP Address |
|---|---|---|
| Node 1 | mariadb-node1 | 192.168.1.101 |
| Node 2 | mariadb-node2 | 192.168.1.102 |
| Node 3 | mariadb-node3 | 192.168.1.103 |
Run the following installation steps on all three servers unless specifically mentioned otherwise.
1. Update Ubuntu
On Node 1, Node 2, and Node 3:
sudo apt update
sudo apt upgrade -y
Check Ubuntu version:
lsb_release -a
You should see Ubuntu 24.04.

2. Set Hostnames
Node 1 - On 192.168.1.101:
sudo hostnamectl set-hostname mariadb-node1
Node 2 - On 192.168.1.102:
sudo hostnamectl set-hostname mariadb-node2
Node 3 - On 192.168.1.103:
sudo hostnamectl set-hostname mariadb-node3
Verify on each node:
hostname
3. Configure /etc/hosts
This is important so that every node can resolve the other nodes.
Run this on all three servers:
sudo nano /etc/hosts
Add:
192.168.1.101 mariadb-node1
192.168.1.102 mariadb-node2
192.168.1.103 mariadb-node3
Test connectivity:
ping -c 3 mariadb-node1
ping -c 3 mariadb-node2
ping -c 3 mariadb-node3
All nodes should be reachable.

4. Install MariaDB
Run on all three nodes:
sudo apt install mariadb-server mariadb-client galera-4 -y
Check MariaDB:
mariadb --version
Check Galera:
dpkg -l | grep galera
5. Enable MariaDB
On all nodes:
sudo systemctl enable mariadb
Do not worry if we stop MariaDB later during the cluster configuration.
6. Configure Firewall
If UFW is enabled, Galera needs communication between the nodes.
On all three nodes, allow:
sudo ufw allow from 192.168.1.0/24 to any port 3306 proto tcp
sudo ufw allow from 192.168.1.0/24 to any port 4567 proto tcp
sudo ufw allow from 192.168.1.0/24 to any port 4567 proto udp
sudo ufw allow from 192.168.1.0/24 to any port 4568 proto tcp
sudo ufw allow from 192.168.1.0/24 to any port 4444 proto tcp
Check:
sudo ufw status
Galera Ports
| Port | Purpose |
|---|---|
| 3306 | MariaDB client connections |
| 4567 | Galera replication |
| 4568 | Galera IST (Incremental State Transfer) |
| 4444 | Galera SST (State Snapshot Transfer) |

If your servers are on a different network, replace
192.168.1.0/24with your actual private network.
7. Stop MariaDB
Do this on all three nodes:
sudo systemctl stop mariadb
Verify:
sudo systemctl status mariadb
It should show that MariaDB is stopped.
8. Configure Galera on Node 1
On Node 1 only:
sudo nano /etc/mysql/mariadb.conf.d/60-galera.cnf
Add:
[mysqld]

bind-address=0.0.0.0

binlog_format=ROW
default-storage-engine=InnoDB

innodb_autoinc_lock_mode=2
innodb_flush_log_at_trx_commit=2
innodb_file_per_table=1

wsrep_on=ON
wsrep_provider=/usr/lib/galera/libgalera_smm.so

wsrep_cluster_name="mariadb_cluster"

wsrep_cluster_address="gcomm://192.168.1.101,192.168.1.102,192.168.1.103"

wsrep_node_name="mariadb-node1"
wsrep_node_address="192.168.1.101"

wsrep_sst_method=rsync
Save: Ctrl + O → Enter → Ctrl + X
9. Configure Galera on Node 2
On Node 2:
sudo nano /etc/mysql/mariadb.conf.d/60-galera.cnf
Add:
[mysqld]

bind-address=0.0.0.0

binlog_format=ROW
default-storage-engine=InnoDB

innodb_autoinc_lock_mode=2
innodb_flush_log_at_trx_commit=2
innodb_file_per_table=1

wsrep_on=ON
wsrep_provider=/usr/lib/galera/libgalera_smm.so

wsrep_cluster_name="mariadb_cluster"

wsrep_cluster_address="gcomm://192.168.1.101,192.168.1.102,192.168.1.103"

wsrep_node_name="mariadb-node2"
wsrep_node_address="192.168.1.102"

wsrep_sst_method=rsync
10. Configure Galera on Node 3
On Node 3:
sudo nano /etc/mysql/mariadb.conf.d/60-galera.cnf
Add:
[mysqld]

bind-address=0.0.0.0

binlog_format=ROW
default-storage-engine=InnoDB

innodb_autoinc_lock_mode=2
innodb_flush_log_at_trx_commit=2
innodb_file_per_table=1

wsrep_on=ON
wsrep_provider=/usr/lib/galera/libgalera_smm.so

wsrep_cluster_name="mariadb_cluster"

wsrep_cluster_address="gcomm://192.168.1.101,192.168.1.102,192.168.1.103"

wsrep_node_name="mariadb-node3"
wsrep_node_address="192.168.1.103"

wsrep_sst_method=rsync
11. Verify Configuration
On each node, verify the MariaDB service configuration:
sudo systemctl status mariadb

12. Bootstrap the First Node
This is the most important step. We need to bootstrap Node 1 first.
On Node 1:
sudo galera_new_cluster
Check:
sudo systemctl status mariadb
It should be running.

13. Check Node 1 Cluster Status
Connect to MariaDB:
sudo mariadb
Run:
SHOW STATUS LIKE 'wsrep_cluster_size';
Initially, you should see:
+--------------------+-------+
| Variable_name      | Value |
+--------------------+-------+
| wsrep_cluster_size | 1     |
+--------------------+-------+
Check cluster status:
SHOW STATUS LIKE 'wsrep_cluster_status';
Expected:
+---------------------+--------+
| Variable_name       | Value  |
+---------------------+--------+
| wsrep_cluster_status| Primary|
+---------------------+--------+
Check node state:
SHOW STATUS LIKE 'wsrep_local_state_comment';
Expected:
+---------------------------+--------+
| Variable_name             | Value  |
+---------------------------+--------+
| wsrep_local_state_comment | Synced |
+---------------------------+--------+
Exit:
EXIT;
14. Start Node 2
Go to Node 2:
sudo systemctl start mariadb
Check:
sudo systemctl status mariadb
Then:
sudo mariadb
Run:
SHOW STATUS LIKE 'wsrep_cluster_size';
You should now see:
+--------------------+-------+
| Variable_name      | Value |
+--------------------+-------+
| wsrep_cluster_size | 2     |
+--------------------+-------+
Also check:
SHOW STATUS LIKE 'wsrep_local_state_comment';
Expected: Synced
Exit:
EXIT;

15. Start Node 3
Go to Node 3:
sudo systemctl start mariadb
Check:
sudo systemctl status mariadb
Then:
sudo mariadb
Run:
SHOW STATUS LIKE 'wsrep_cluster_size';
Expected:
+--------------------+-------+
| Variable_name      | Value |
+--------------------+-------+
| wsrep_cluster_size | 3     |
+--------------------+-------+
Check:
SHOW STATUS LIKE 'wsrep_cluster_status';
Expected: Primary
And:
SHOW STATUS LIKE 'wsrep_local_state_comment';
Expected: Synced

16. Check the Complete Cluster
Run this on any node:
sudo mariadb
Then:
SHOW STATUS LIKE 'wsrep%';
Important values:
| Variable | Expected Value |
|---|---|
| wsrep_cluster_size | 3 |
| wsrep_cluster_status | Primary |
| wsrep_local_state_comment | Synced |
| wsrep_ready | ON |
The desired state:
+------------------------------+----------------+
| Variable_name                | Value          |
+------------------------------+----------------+
| wsrep_cluster_size           | 3              |
| wsrep_cluster_status         | Primary        |
| wsrep_local_state_comment    | Synced         |
| wsrep_ready                  | ON             |
+------------------------------+----------------+

17. Test Database Replication
Now we will test whether data created on Node 1 appears on Node 2 and Node 3.
On Node 1:
sudo mariadb
Create a database:
CREATE DATABASE cluster_test;
USE cluster_test;
Create a table:
CREATE TABLE users (
    id INT PRIMARY KEY AUTO_INCREMENT,
    name VARCHAR(100)
);
Insert data:
INSERT INTO users (name) VALUES ('Alice');
Check:
SELECT * FROM users;
You should see:
+----+-------+
| id | name  |
+----+-------+
|  1 | Alice |
+----+-------+
Exit:
EXIT;
18. Check Node 2
Connect to Node 2:
sudo mariadb
Run:
USE cluster_test;
SELECT * FROM users;
You should see:
+----+-------+
| id | name  |
+----+-------+
|  1 | Alice |
+----+-------+
This means replication is working.

19. Check Node 3
On Node 3:
sudo mariadb
Run:
USE cluster_test;
SELECT * FROM users;
You should also see Alice.
20. Test Replication in the Other Direction
On Node 3:
USE cluster_test;
INSERT INTO users (name) VALUES ('Bob');
SELECT * FROM users;
Expected:
+----+-------+
| id | name  |
+----+-------+
|  1 | Alice |
|  2 | Bob   |
+----+-------+
Now go to Node 1:
sudo mariadb
Run:
USE cluster_test;
SELECT * FROM users;
You should see both Alice and Bob.

21. Test Node Failure
Now we can test what happens when one node goes down.
Stop Node 3:
sudo systemctl stop mariadb
On Node 1, check:
sudo mariadb
SHOW STATUS LIKE 'wsrep_cluster_size';
Expected:
+--------------------+-------+
| Variable_name      | Value |
+--------------------+-------+
| wsrep_cluster_size | 2     |
+--------------------+-------+
The cluster should remain operational because 2 out of 3 nodes are still available.

22. Bring Node 3 Back
On Node 3:
sudo systemctl start mariadb
Wait a few seconds, then check:
sudo mariadb
SHOW STATUS LIKE 'wsrep_local_state_comment';
Expected: Synced
Then:
SHOW STATUS LIKE 'wsrep_cluster_size';
Expected: 3

23. Important Warning About Bootstrapping
Do not run this casually:
sudo galera_new_clusterThis command is used to bootstrap a new primary cluster. You normally use it when starting a completely new cluster or when the entire cluster has gone down and you need to recover it.
Do not run
galera_new_clusteron Node 2 or Node 3 while Node 1’s cluster is already running.
24. Useful Troubleshooting Commands
| Command | Purpose |
|---|---|
sudo systemctl status mariadb |
Check MariaDB status |
sudo journalctl -u mariadb -n 100 --no-pager |
Check recent MariaDB logs |
sudo journalctl -u mariadb -f |
Follow MariaDB logs |
sudo mariadb -e "SHOW STATUS LIKE 'wsrep%';" |
Check Galera status |
sudo mariadb -e "SHOW STATUS LIKE 'wsrep_cluster_size';" |
Check cluster size |
sudo mariadb -e "SHOW STATUS LIKE 'wsrep_cluster_status';" |
Check cluster state |
sudo mariadb -e "SHOW STATUS LIKE 'wsrep_local_state_comment';" |
Check local node state |
25. Final Expected Result
After everything is configured, all three nodes should report:
Cluster Name:        mariadb_cluster

Node 1:              192.168.1.101
Node 2:              192.168.1.102
Node 3:              192.168.1.103

Cluster Size:        3
Cluster Status:      Primary
Node State:          Synced
Galera Ready:        ON
And if you create data on one node:
Node 1
  ↓
Galera
  ↓
Node 2 + Node 3
The data should be available on the other nodes.

Important Production Note
This is a learning/lab setup. Before using it in production, you should additionally configure:
- Secure SST authentication
- TLS/encryption
- Proper firewall restrictions
- Backups
- Monitoring
- Quorum/recovery procedures
- An appropriate MariaDB/Galera configuration for your workload
Also, don’t expose MariaDB port 3306 to the public internet. Keep cluster traffic on a trusted/private network whenever possible.
Conclusion
You have successfully set up a 3-node MariaDB Galera Cluster on Ubuntu 24.04. The cluster provides synchronous multi-master replication, meaning data written to any node is immediately available on all other nodes. This setup is ideal for high-availability database environments where you need fault tolerance and load balancing.
Table of Contents